QGIS#
Note
The instructions on this page are written primarily for Windows operating systems. If you are using a different operating system (e.g., MacOS, Linux), you can still download
Note
On Windows, you will need to have administrator rights to your machine in order to install QGIS.
To install QGIS, all you need to do is visit the downloads page and select the installer for your operating system.
Once the file downloads, locate it on your computer (most likely, in your Downloads folder), then double-click on
it to start the installer.
If you install QGIS using the Windows installer, it should automatically include both SAGA GIS and GRASS GIS, two additional programs that extend the power of QGIS.
To check this, look at the QGIS Start menu folder (Start > All Apps > QGIS). You should see these programs installed as well:
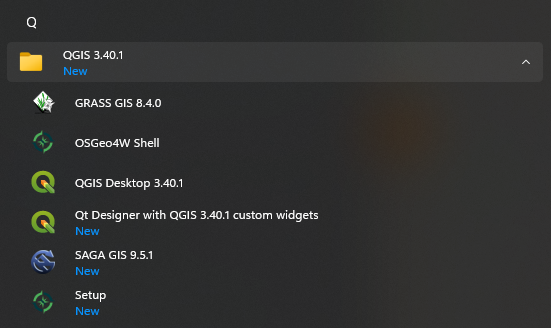
If you see QGIS, SAGA GIS, and GRASS GIS in the Start menu folder, you can skip to the qgis plugins
section below.
If you do not see these programs, you can follow the instructions in the next two sections below to install them.
saga gis#
To download and install SAGA GIS by itself, visit the
downloads page for the project. Download the
installer for your operating system (for Windows, this is likely to be saga-{version}_x64_setup.exe,
where {version} is the software version).
Once the installer downloads, run the installer, following the instructions given.
grass gis#
To download and install GRASS GIS, visit the downloads page for the project. Find your operating system, then select the Standalone installer for the current version of GRASS GIS.
Warning
Make sure to download the installer for your operating system, and not the source code! You are welcome to try to compile and install the software from source, but it is likely to be much more difficult than using the installer!
qgis plugins#
Once you have downloaded and installed QGIS, and ensured that both GRASS GIS and SAGA GIS are installed, you can finish the setup by installing the plugins for both programs1.
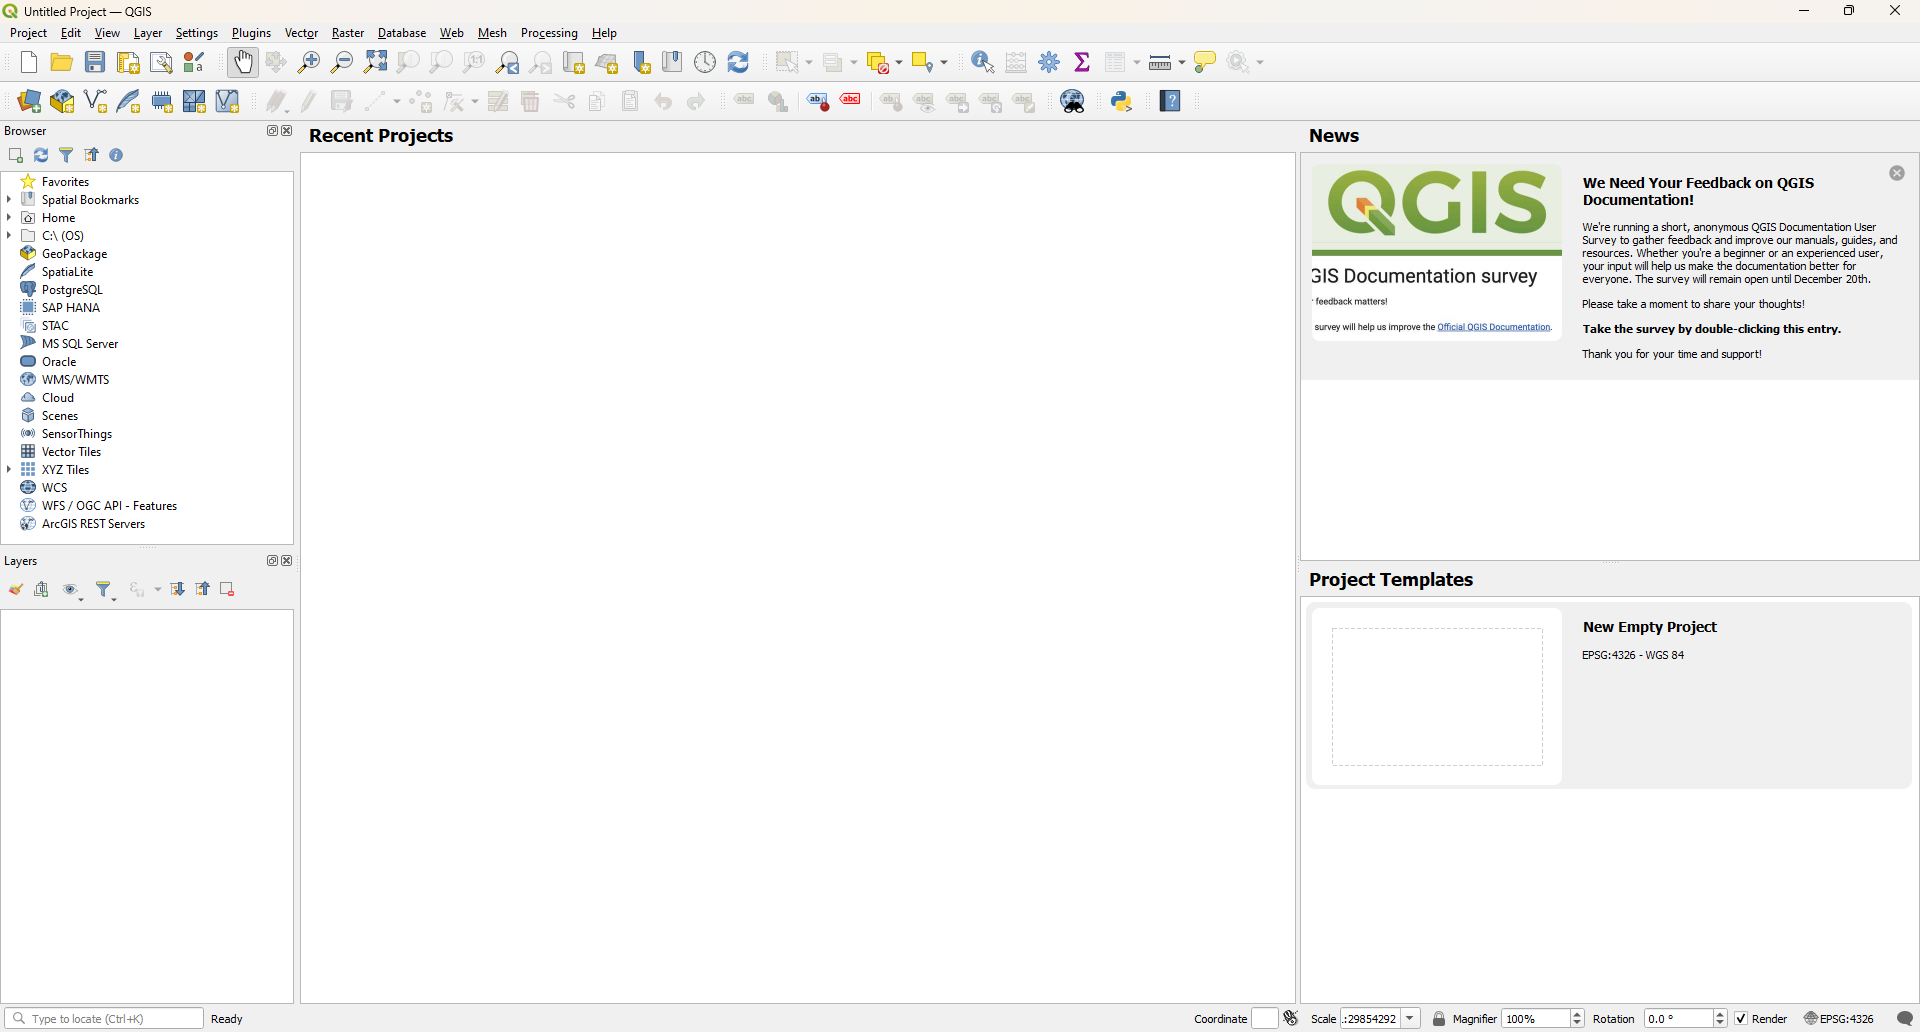
First, open QGIS. You should see something like the following:
To install/manage plugins, open the manager from the Plugins menu (Plugins >
Manage and Install Plugins). You should see something like the following:
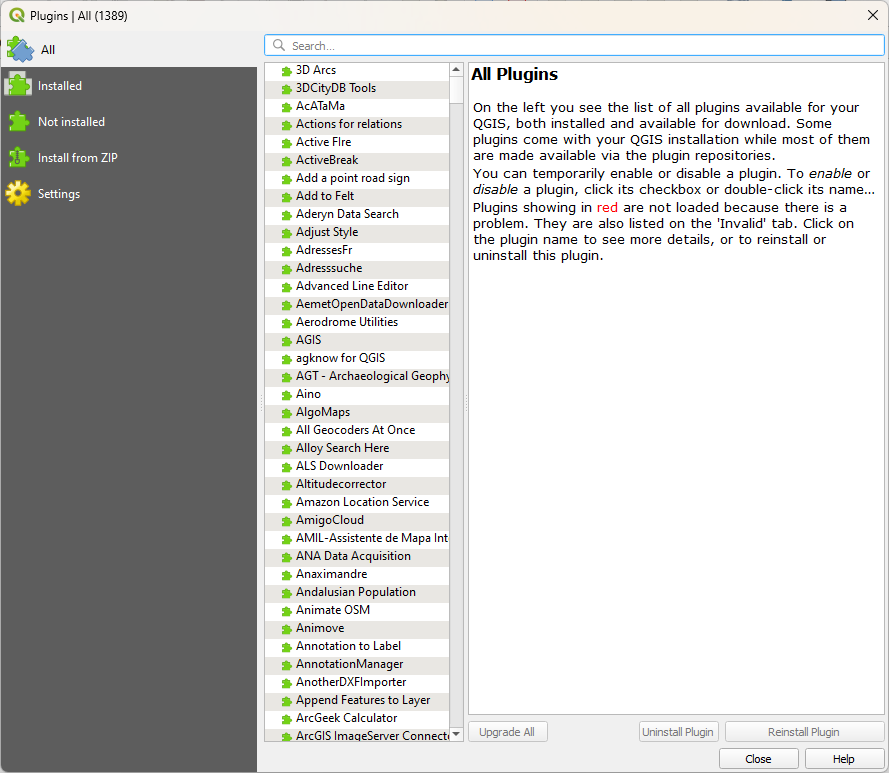
As you can see, there are a huge number of user-created plugins available in QGIS. We’re only going to install
two at the moment, but feel free to have a browse to see if you can find anything useful.
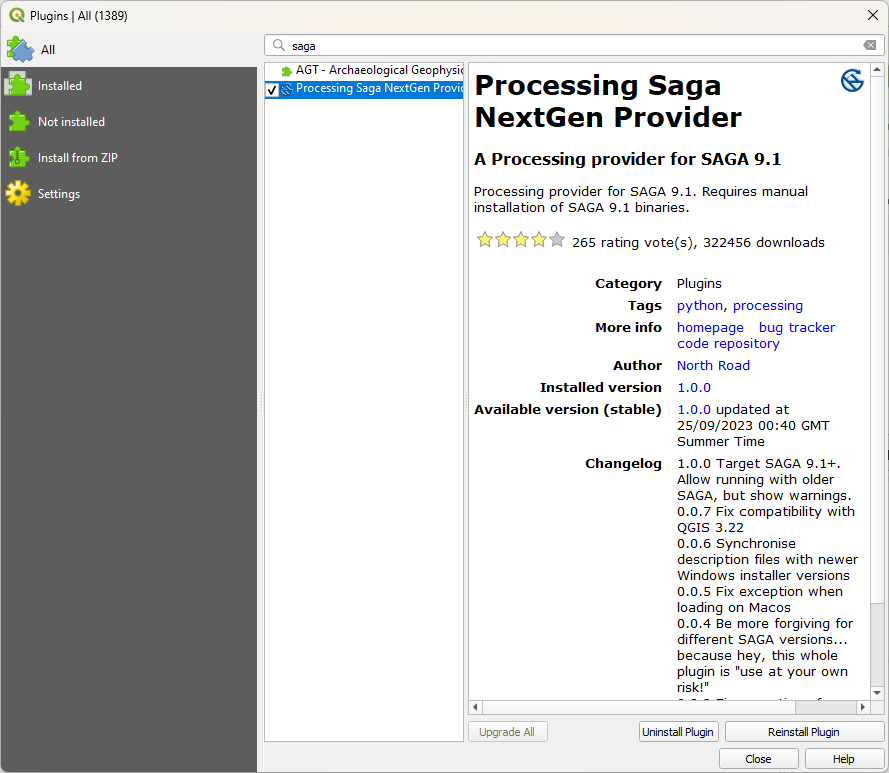
To install the SAGA plugin, type “saga” into the search bar at the top of the window. You should see two options - make sure to select Processing Saga NextGen Provider:
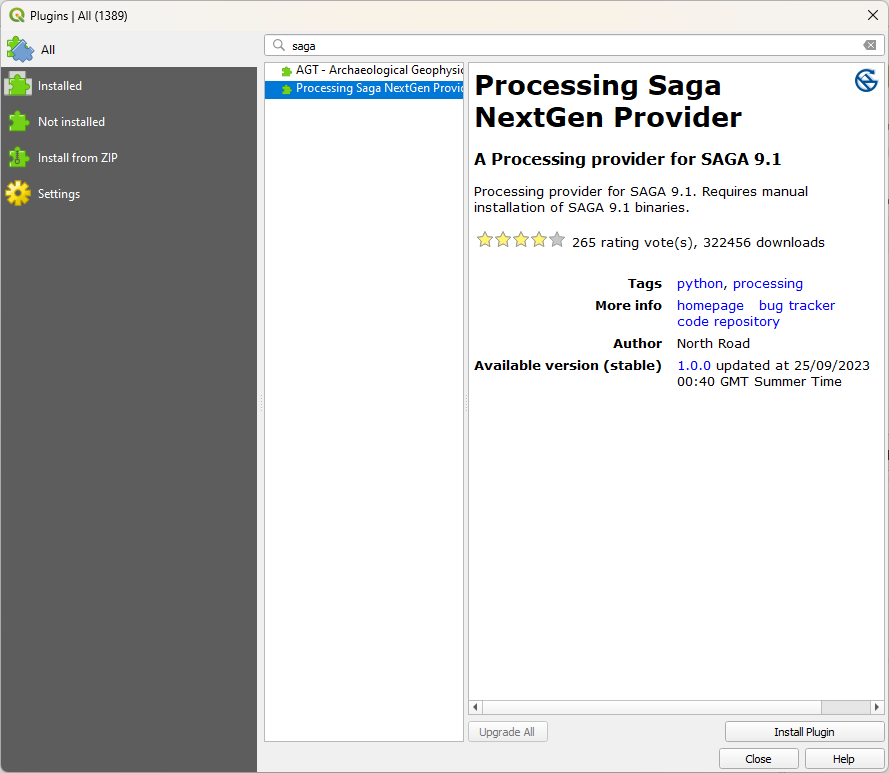
Once you have selected the plugin, click Install Plugin to install it. After a moment, you should see the
plugin finish installing:
Now, delete “saga” from the search bar, then type in “grass”. Again, you should see a few options here - make
sure to select GRASS GIS Processing Provider:
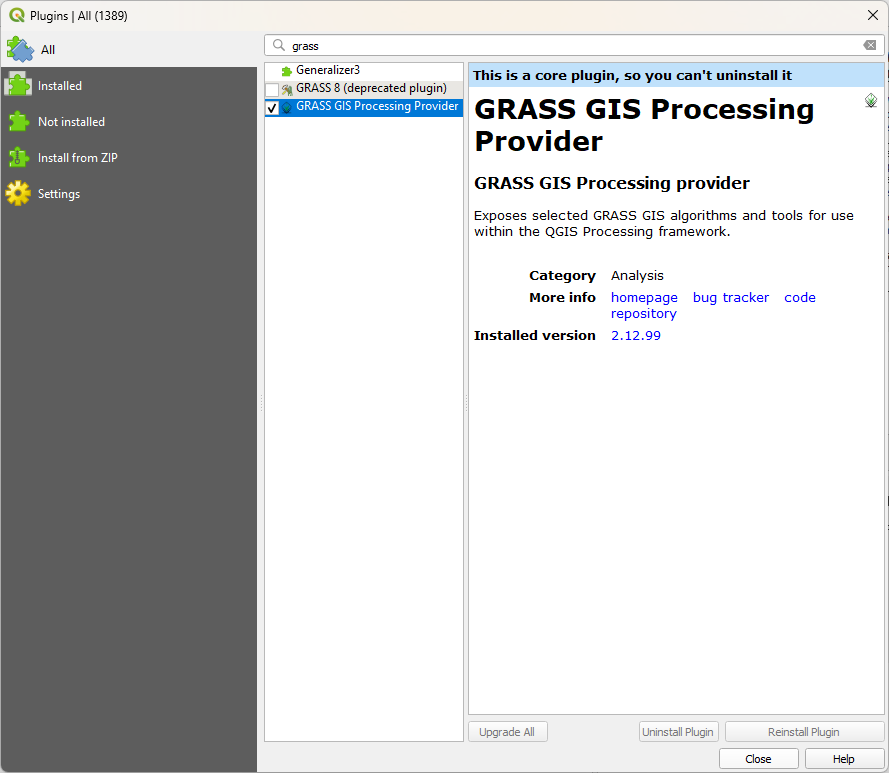
It may already be installed; if not, you can install it the same way that you did for SAGA, by clicking
Install Plugin. Finally, check what plugins you have installed by clicking on the Installed tab in the manager:
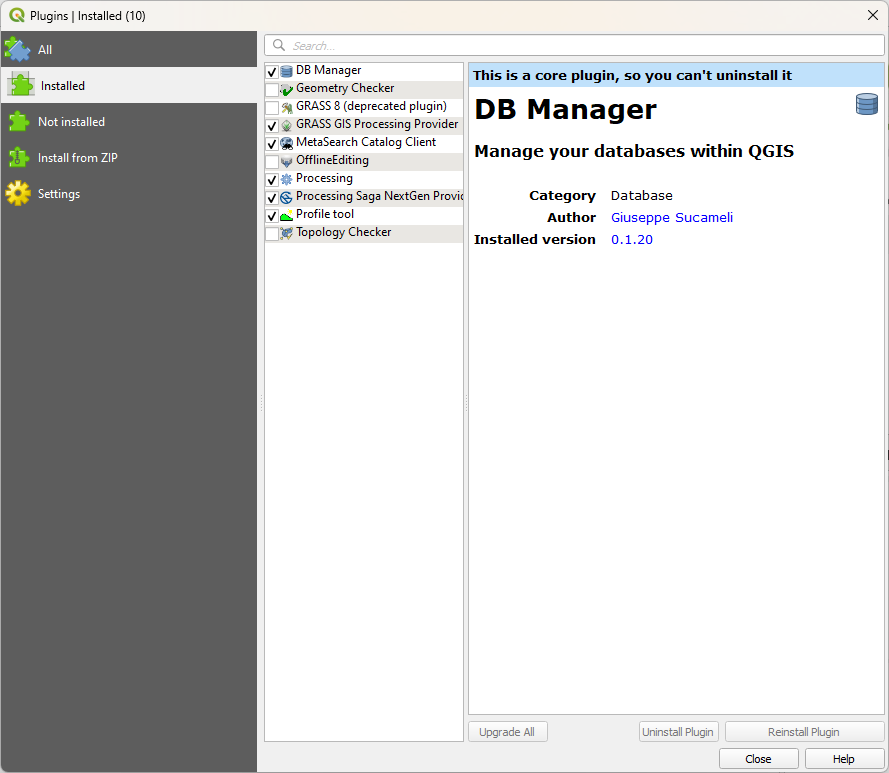
QGIS installs some plugins by default, though it doesn’t necessarily enable them. You can enable (or disable)
plugins by checking (or unchecking) the box next to each one. We can see here that both SAGA and GRASS processing
are installed and enabled - as long as this is the case, you can close the plugin manager and return to the main
window.
To access the functions provided by SAGA, GRASS (and other) plugins, you can open the Processing toolbox (Processing > Toolbox), which will open as a panel on the right side of the window:
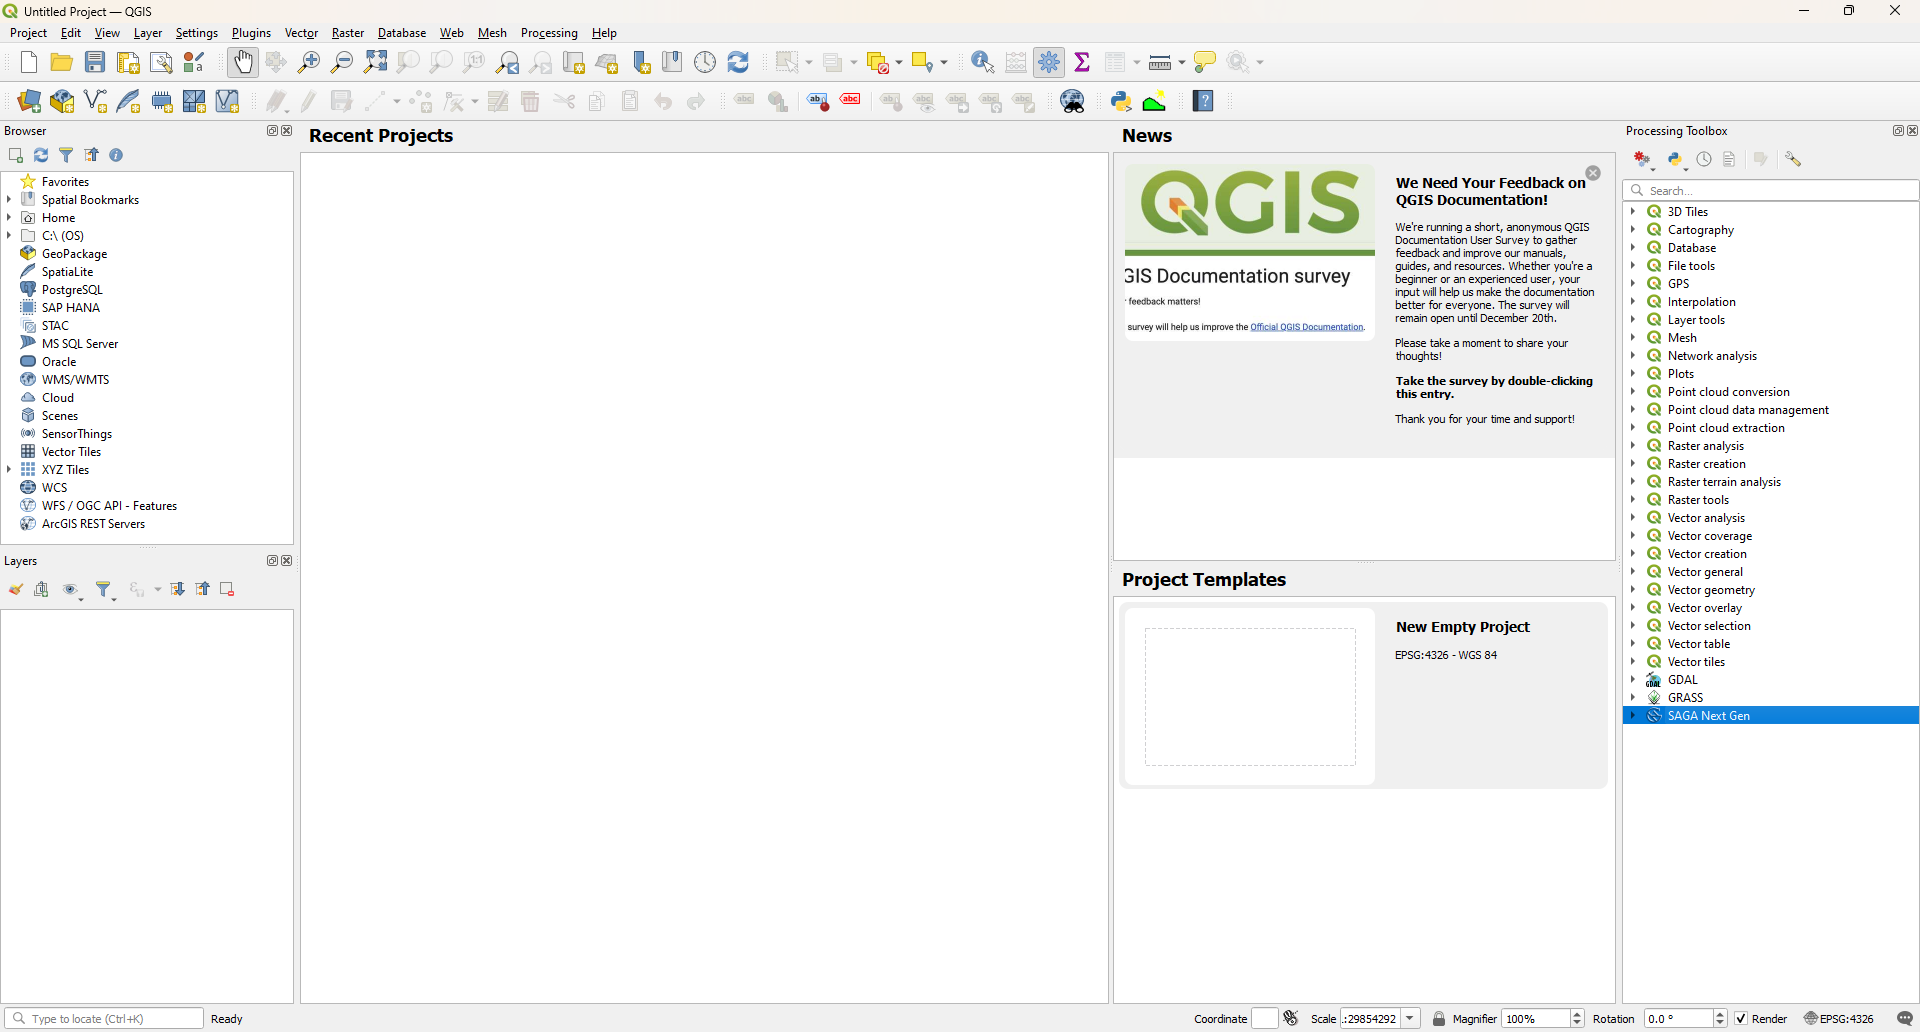
You should be able to see the built-in QGIS functions, as well as functions provided by GDAL (for working with
rasters), GRASS, and SAGA.
At this point, you can move on to the next step of the setup - installing Orfeo ToolBox.
notes#
- 1
Both GRASS GIS and SAGA GIS are standalone GIS programs in their own right (as you will see in this module). We can use many of the functions provided by GRASS, SAGA, and other programs provided by other users - you can even write your own!