configuring jupyter#
Note
These steps are optional, as in most cases you will be able to use jupyter with the default settings.
generating a config file#
In order to change the settings used by jupyter on launch, you first have to generate a configuration (“config”) file.
To do this, open the Command Prompt from Anaconda Navigator (making sure that your egm722 environment
is active). At the Command Prompt, enter the following command:
jupyter lab --generate-config
This should create a new folder, .jupyter, in your home directory, along with a python script in that directory:
jupyter_lab_config.py.
Note
Be sure to check/note the location that the command prints out - it may be slightly different from what I have on my computer.
changing the default launch directory#
By default, Jupyter Lab will open in your home directory (on Windows, this is most likely
C:\Users\<your_username>, or in whatever directory you launch it from.
For security reasons, jupyter will not allow you to navigate to the parent directory of the launch location,
so if you have cloned the repository to a different location (e.g., C:\egm722\ or an external drive such as D:\)
and you launch from your home directory, you will need to change the default opening folder to wherever you have
cloned your repository.
At the command prompt, with your egm722 environment activated, enter the following command:
jupyter --paths
This will show you the path to the version of jupyter used by your egm722 environment:
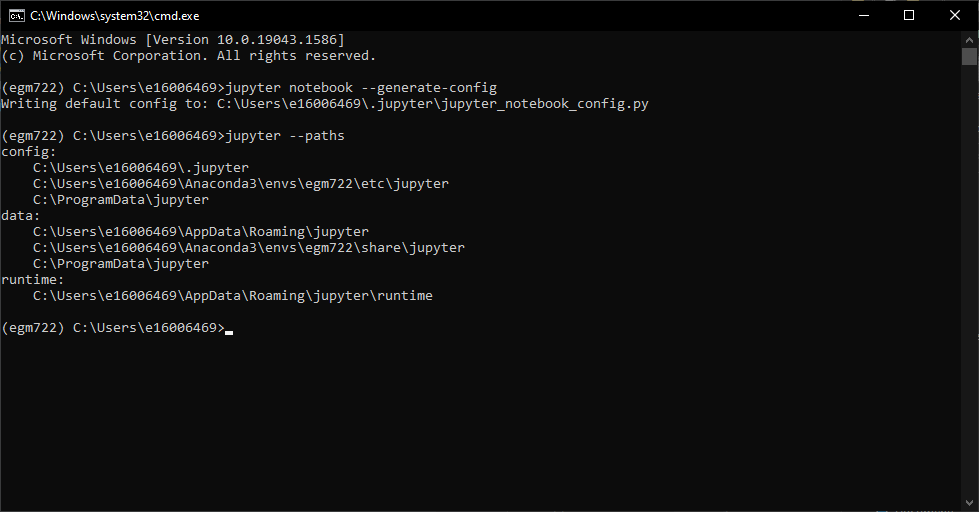
In the example above, it’s:
C:\Users\e16006469\Anaconda3\envs\egm722\etc\jupyter
Now, copy the script jupyter_lab_config.py into that folder (you may need to create a new folder,
jupyter, in C:\Users\<your_username>\Anaconda3\envs\etc).
Open this newly-copied script in your IDE of choice (or a text editor such as Notepad++ or Notepad) and search
for c.ServerApp.root_dir - for me, it’s at line 1018:

Uncomment this line (remove the # and the space from the start), and add the path to your repository here
(remember to add an r before the first quotation mark):

Now, save the file, and launch Jupyter Lab, making sure that your egm722 environment is still enabled.
You should see that it opens in your repository folder by default:
Note
This has only set the default “root” directory for this version of jupyter.
If you create another conda environment, you will need to repeat the steps of copying the config file to the
<path-to-conda>\envs\<new environment>\etc\jupyter directory, then editing the c.ServerApp.root_dir setting
to point to the desired directory.
configuring the jupyterlab terminal#
This step will enable you to use the Terminal in JupyterLab with a conda environment pre-loaded.
Note
This step should only be necessary on a Windows computer. To check whether you need to complete this step, launch Jupyter Lab, then open a Terminal.
If you see a prompt that looks like the following:
(egm722) C:\Users\bob\egm722>
Then you have already changed the terminal from the default PowerShell to the Command Prompt, and you can move on to installing PyCharm.
If you are using Windows, we need to change the Terminal from the default (PowerShell) to the Command Prompt (CMD.exe).
Warning
If you have not already done so, please complete the steps in the section generating a config file above.
First, open your Comand Prompt and type the following command:
where cmd.exe
This should print out something like the following:
C:\Windows\System32\cmd.exe
Make sure to keep this window open while you move on to the next step - you will need to copy this path into your config file to finish setting up the terminal.
Now, open the original config file in Notepad++ or a similar text editor (it should be located at
%HOME%\.jupyter\jupyter_lab_config.py), and search for c.ServerApp.terminado_settings (for me, this is at
line 1062):
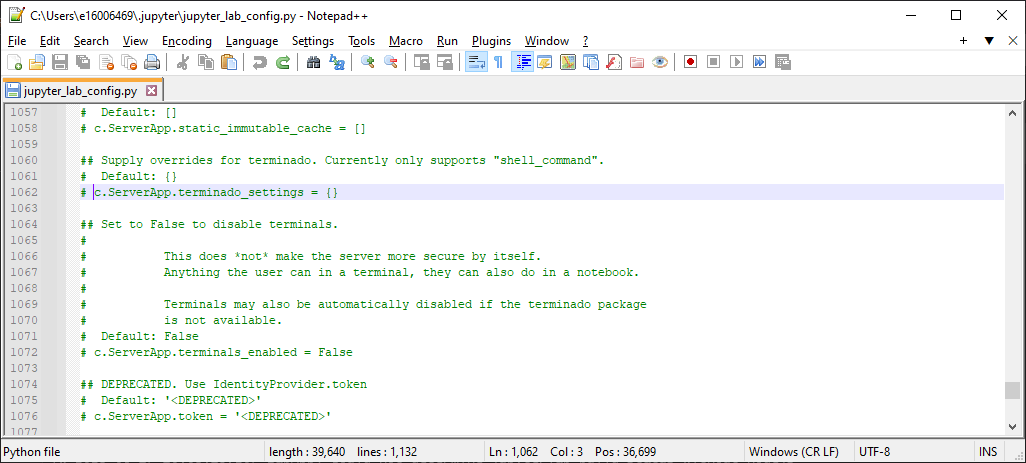
Uncomment this line by removing the # symbol and the space at the beginning of the line. Then, inside of the
curly brackets on this line, add the following text:
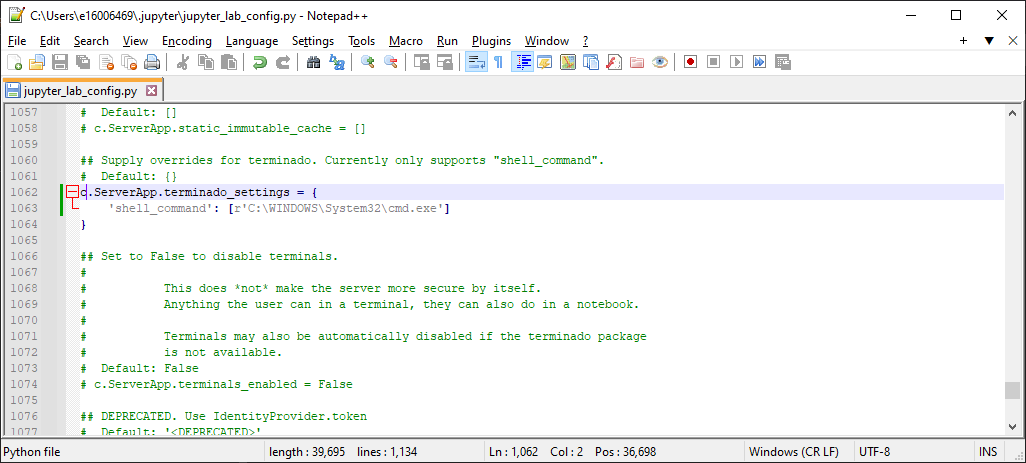
'shell_command': [r'{cmd_path}']
Making sure to replace {cmd_path} with the path to cmd.exe output by where cmd.exe.
For example, if your cmd.exe is located at C:\WINDOWS\System32\cmd.exe, your file should now look like this:
Once you have changed the file, save the changes, then close it. Now, launch JupyterLab from the command prompt
(again, making sure that your egm722 environment is active):
jupyter lab
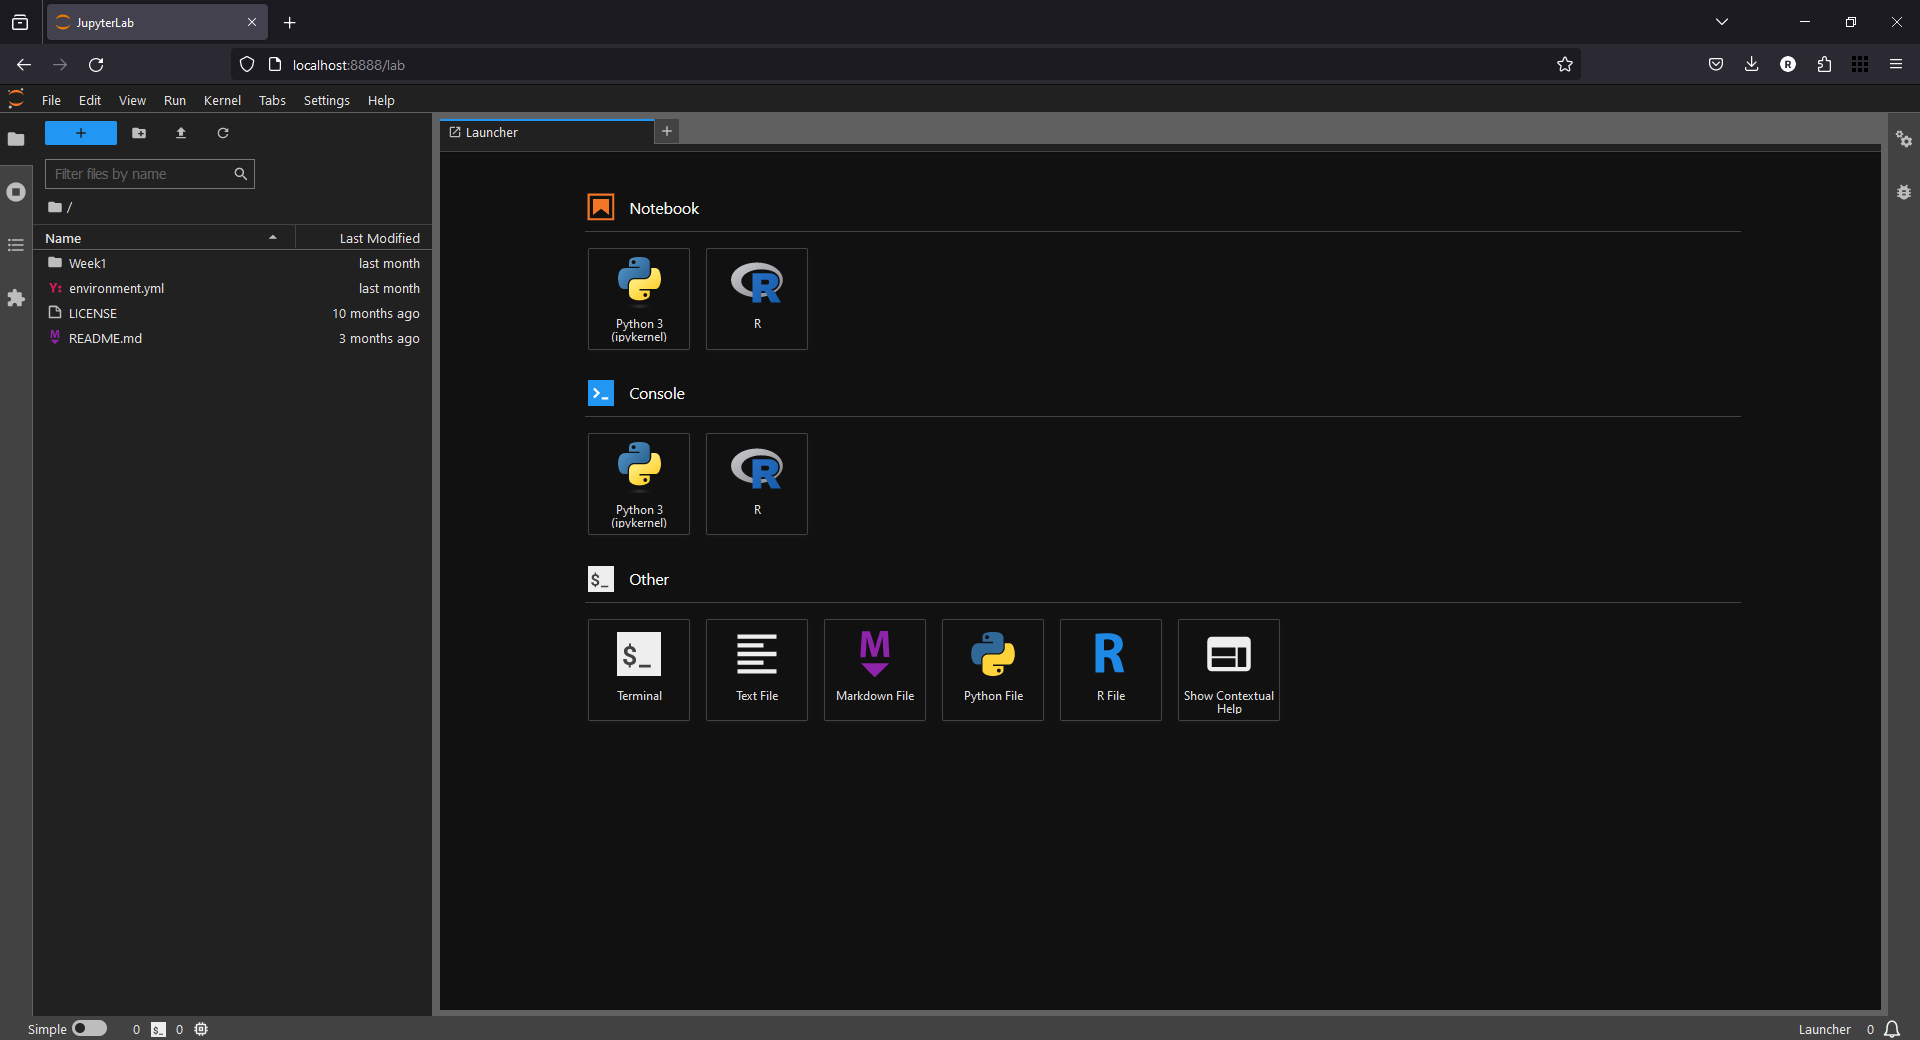
You should see a browser window like this open up:
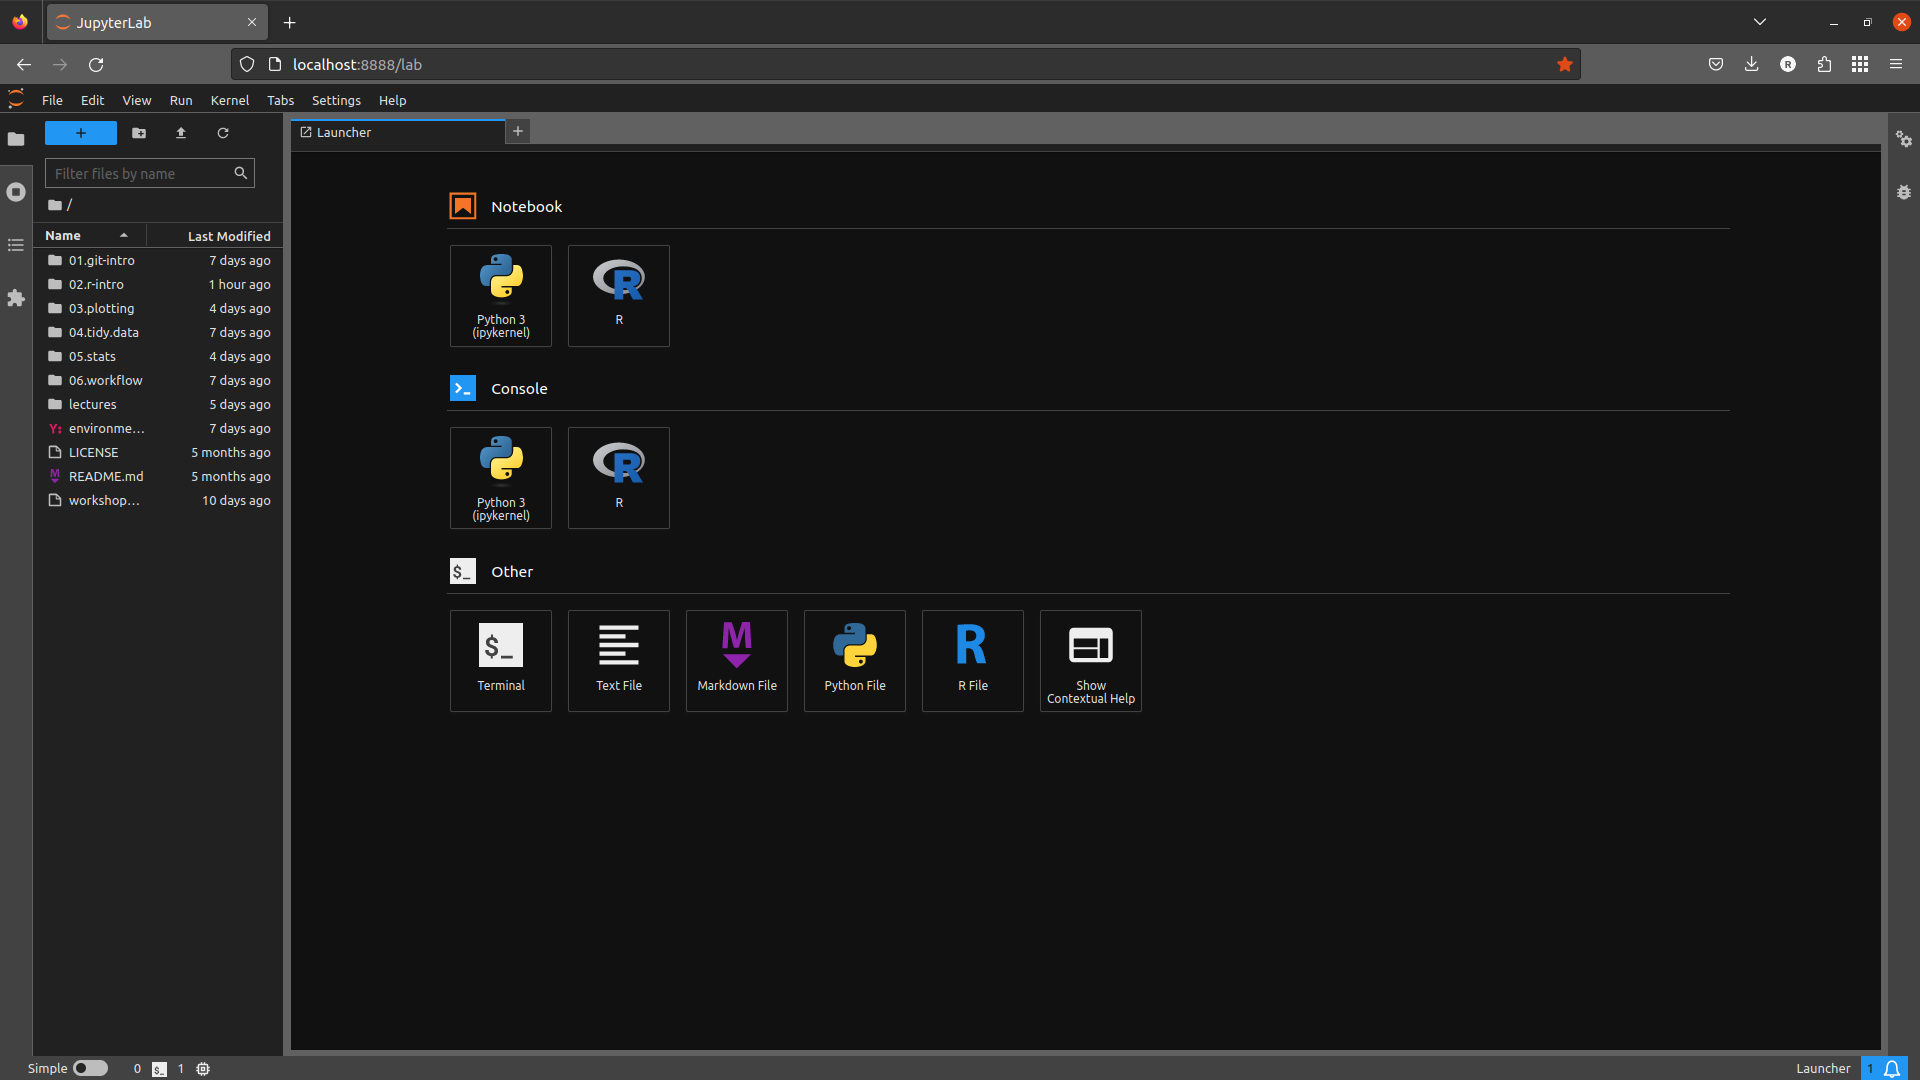
If you don’t see this exactly, don’t worry. Click the blue + button in the upper left-hand corner of the window
to open the Launcher.
Next, click on Terminal under Other to launch a terminal window. You should see something like this:

If you don’t see a Command Prompt session with your egm722 environment activated, please let me
know and I will do my best to help troubleshoot.