git troubleshooting#
On this page, you will find some help/suggestions for how to untangle the occasional knot that can arise when working with git.
fixing merge conflicts#
Warning
Jupyter notebook (.ipynb) files contain not just the markup/code for the notebook, but also any/all outputs, records of whether each cell has been executed (run), etc.
As such, it is VERY IMPORTANT for you to clear all of the outputs before you commit these files.
If you don’t, you are going to have a bad time trying to clean up the merge conflicts.
When merging different branches using git, you might see the following message:

Don’t panic. All this means is that the same file (or files) has been edited on multiple branches, and git
doesn’t know which version is the “correct” one.
When you see this message, you’ll need to open the file in a text editor (e.g., NotePad, Notepad++, but not Microsoft Word).
You’re going to be looking for lines that look like this:
<<<<<<< HEAD

<some stuff>

=======

<some other stuff>

>>>>>>> cfa26ae841c9e6d252ce80239f31e4c5b568efb6
All you need to do is delete either <some stuff> or <some other stuff>, depending on which version you want to
keep. So, for example, with this:

we want to keep the “import os” statement. So, we delete this:
<<<<<<< HEAD
=======
as well as this:
>>>>>>> cfa26ae841c9e6d252ce80239f31e4c5b568efb6
so that we’re left with the version that we want:

Once you’re done editing the file (note that there may be multiple conflicts, so you’ll need to check the file
carefully!), you can add it like so:
git add <the file>
followed by:
git status
If you have successfully cleared all of the conflicts, you should see something like the following:
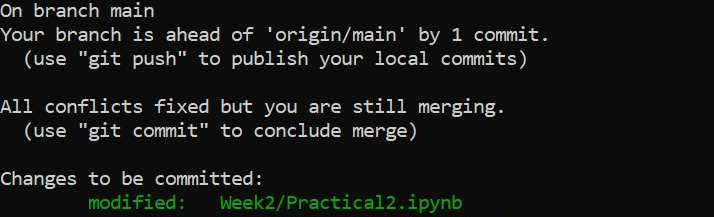
At this point, you can commit the merge using git commit:
git commit -m "this is a commit message that makes sense"
and continue working.
restoring a deleted branch#
If you accidentally delete a branch before it has been fully merged into the main branch, don’t panic.
Open up a Command Prompt window, and navigate to your repository (in the example below, this is
C:\Users\e16006469\egm722\bobtheburner):
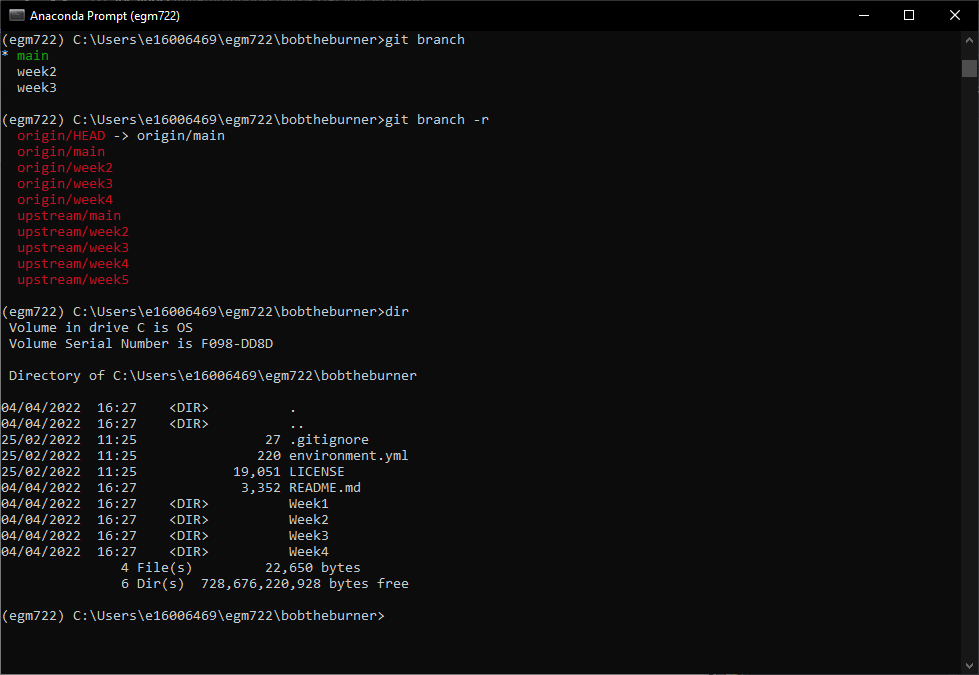
From the above, you can see from git branch that there is no local week5 branch. From git branch -r,
which lists all of the remote branches, you can see that there is no remote week5 branch, either.
And, finally, from the output of the dir command, you can see that we only have the files for weeks 1-4 in our
current working directory.
To fix this, we can check out the upstream/week5 branch, which fortunately still exists.
First, though, check the list of remote repositories using git remote -v:
git remote -v

Note
If you don’t see upstream as one of your remote repositories, you can add it with the following command:
git remote add upstream https://github.com/iamdonovan/egm722.git
this will add a new remote repository (git remote add), call it upstream, and point it to the iamdonovan/egm722 repository.
Now you need to make sure that you download (fetch) all of the remote branches, so that when you try to check something out from
the new remote, git recognizes it:
git fetch --all
You should see something like the following:

Now, you can check out the deleted branch from the upstream repository:
git checkout -b <deleted branch> upstream/<deleted branch>
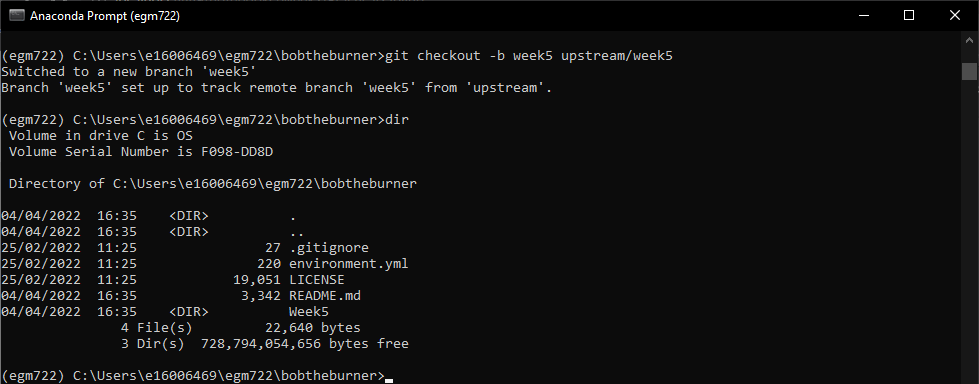
And you should be able to continue working with the branch as you did before deleting it.